The lab is a split room configuration with a Design Team “War Room” and a User Interaction Room for interviewing, paper prototype testing, and usability testing.
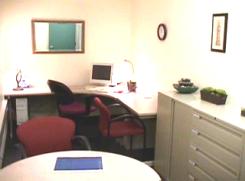
This room is intended for team design and brainstorming sessions. The Design War Room has 3 white board walls and 1 pin-up wall. Teams use a “working-on-the-wall” approach to meetings. This allows everyone to visualize what is being done, allows everyone to easily contribute, and it drives a shared understanding amongst the team members. The writing walls have a metal backing so that magnets can be used to hold models and design ideas. Work is done on large sheets of poster paper (See Figure 2). Each time the team meets they put up the work that has been done so far so that they are immersed in the data. This allows team members to “walk the wall” as a way to keep in mind the interpretations of the data. It also creates a group memory or group consciousness to recall what the team has accomplished before. The poster paper approach allows multiple teams to use it similar to a dedicated design room.
The tables in the Design War Room are easily movable to accommodate different configurations, such as for team conference meetings or videotape viewing.
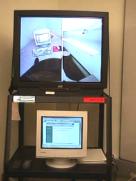
This room is intended for design teams to interact with users through interviewing, paper prototype testing (low-fidelity), and usability testing (high-fidelity). One or two of the design team members can be interacting with users in this room, while other members can be observing over the closed-circuit cameras in the Design War Room (See Figure 3). The monitor in the Design War Room is slaved to the computer in the User Interaction Room.
|
|
|
|
Figure 3: User Interaction Room and observation equipment |
|
The user sessions are video taped to allow teams to review the sessions and gather details as needed. A dome camera provides a view of the users screen or can be rotated to get a view of the table for interviewing or paper prototyping (See Figure 4). A second fixed camera provides a close-up view of the user to capture facial expressions and body gestures. The monitor can be split between both cameras or it can be put on just one or the other camera views.
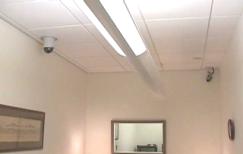
Figure 4: User observation cameras
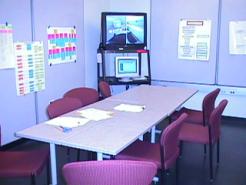
While the rooms are well insulated, team members in the observation area are instructed to keep comments in a quiet tone of voice. When users are brought into the lab, a partition is placed so that the user cannot see other members of the design team (See Figure 5). This helps reduce user’s anxiety.
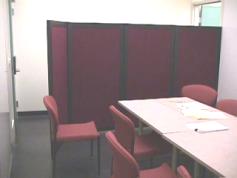
Figure 5: Observation room partition
The construction cost of the HCI Lab was approximately $20,000 (USD). This includes the cameras and monitoring equipment, cost to split the room, cost of the writing walls, and the computers. We have explored a few alternatives to reduce this cost significantly. For example a single pan camera could be used instead of two cameras. To capture the user’s reactions a mirror placed by the monitor would reflect the user’s face into the camera’s image. Some of the activities can also be accomplished even if a dedicated room cannot be found. For example user interviewing and paper prototype testing could still be accomplished with a camcorder mounted to a tripod and any quite room.